
Understanding AWS Developer Tools
CodePipeline = CodeCommit -> CodeBuild -> Deploy
If you never heard about the AWS Developer Tools, I will briefly talk about this set of tools.
AWS CodeCommit
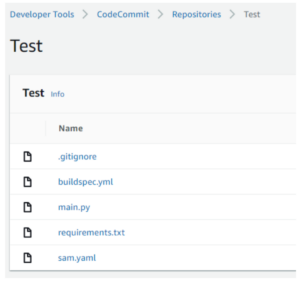
This service/tool provides you a private git repository. Much like Bitbucket or GitHub. You just create a new repository (like a new project in GitHub), clone the repository in your computer and start to put files in there using git commands like commit, push and pull.
The credentials solutions in AWS for CodeCommit is HTTPS Git credentials inside IAM User. If you have any difficulties to create this credentials, take a look in the CodeCommit user guide at https://docs.aws.amazon.com/codecommit/latest/userguide/setting-up-gc.html. Be aware that you can have up to 5 users with Git Credentials for free in AWS and pay $1 for any additional user.
So you created the repository, put your code on it, developed and tested in your favorite IDE but that’s not how you want to deploy the code in your services. You some times need it to be compiled, like Java, or to be packaged with the needed libraries, like Python. That’s the job of the next service.
AWS CodeBuild
The CodeBuild service allows you to get something (usually your code) from a origin and generates for you an output (usually a file).
To tell the service how it can generate an output for you, you need to specify an buildspec.yml, within your project, with the specifications and commands to generate the desired output. It’s much like the generation of a Docker Image with a Dockerfile or the generation of EBExtension commands for Beanstalk.
Below is the generated buildspec.yml that I generate for my Python code:
version: 0.2

phases:
  install:
    runtime-versions:
      python: 3.8
  pre_build:
    commands:
      - echo Build enviromment `uname -a` `aws --version 2>&1` `python --version`
      - echo Started build at `date`
      - pip install -r requirements.txt -t .
      #- mkdir /tmp/
      - rm buildspec.yml .gitignore
      - mv sam.yaml /tmp/
  build:
    commands:
      - echo Building at `date`
      - zip -r /tmp/output.zip *
      - aws cloudformation package --template-file /tmp/sam.yaml --s3-bucket $S3_BUCKET --output-template-file template.yaml
  post_build:
    commands:
      - echo Finished build at `date`
artifacts:
  files:
    - template.yaml
  discard-paths: yes
You can notice that it has a list of runtime versions to run. You can specify your code language version in this section of the buildspec without worrying about how the installation of Python will occurs.
Next you have pre_build commands to do some installations or preparations before the actual build. With Python, I tell the buildspec to install the Python libraries from requirements.txt in the same folder from the code. After this, it will remove buildspec.yml and .gitignore since Idon’t need this to run the Python Code. The last step from pre_build is to move the sam.yaml (AWS Serverless Applicaton Model) file to /tmp/ folder because it will need this file to generate the output.
In the build section, I simply zip all the files and libraries folders to /tmp/output.zip, and next step is to use the sam.yaml model to generate a CloudFormation package that will get the /tmp/output.zip, put it in the S3 Bucket defined in the $S3_BUCKET environment variable and generate an file called template.yaml. This is the template file that CloudFormation will use to create the Lambda Function with the code generated in /tmp/output.zip.
For whom don’t about the SAM files, it’s a simplification for CloudFormation to create serverless application within AWS. It can generate API Gateway, SQS queues, Lambda Functions wih little effort.
Take a look in the sam.yaml file:
AWSTemplateFormatVersion: 2010-09-09
Transform: AWS::Serverless-2016-10-31
Description: SAM Template for Deploy Python code to Lambda
Parameters:
Name:
Type: String
Resources:
LambdaFunction:
Type: AWS::Serverless::Function
Properties:
FunctionName: !Ref Name
CodeUri: /tmp/output.zip
Handler: main.lambda_handler
Runtime: python3.7
MemorySize: 128 Timeout: 30 # seconds, 900 max
It has a parameter called Name, that is the name of Lambda Function. And I define some parameters for this Lambda Function.
I tell where is the code for this function (remember that the output from buildspec.yml is /tmp/output.zip), what Runtime to run, what is the memory size and timeout in seconds. With this little code it can create a CloudFormation template that create the Lambda Function with the minimum needs to run.
But after you compiled or packaged your application and generated a CloudFormation script, you need to run it. In the next step you need the next service to tie up all this complex input and output files.
AWS CodePipeline
Basically CodePipeline receive some input, it can be your code on CodeCommit, BitBucket or GitHub, or some file in S3; and generates a output or a desired state. It also can have some manual approval between state to manual authorize a production deployment or it can be automatic to deploy in staging environment.
The structure that I created for this test is show below:

It has as source the CodeCommit repository that I created with the stage name Source. The code from CodeCommit is an input for the next stage, the Build stage. This Build stage calls the CodeBuild service and generates an CloudFormation template as output and this template is an output for Deploy stage. It could have an test stage to do some automatic testing or an staging deploy to deploy the build in stating environment but I wanted to keep it simple.
The Source and Build stages are the CodeCommit and CodeBuild service as I wrote above but the Deploy stage is very easy because CodePipeline handles to you the CloudFormation deployments.
CodePipeline supports a few types of CloudFormation deployment, in this test I used CHANGE_SET_REPLACE in Deploy action (it only validates the CloudFormation template and don’t create the resources) and CHANGE_SET_EXECUTE in ExecuteChangeSet action(this command creates the CloudFormation resources).
CloudWatch Rule Event
Last but not least, you have to setup a CloudWatch Rule Event to triggers your CodePipeline pipeline when there’s a new release in CodeCommit repository. This will very important piece to create the start the automation process, without it you would have to call the CodePipeline start execution process via console or command lines.
CloudFormation
So, I talked about the AWS Developer Tools and now you have some idea of how to implement and deploy a test solution like a did. But what if you want to deploy dozens or hundreds of lambda or microservices solutions; how to keep/mantain all this DevOps workflows with CodePipeline ?
The solution is use CloudFormation to create a bunch of templates that covers all of your needs.
You may not notice so far, but all this services from AWS Developer Tools services roles, execution roles, policy permissions, environment variables, input/output from CodePipeline … To keep all this connections secured and replicable you have to use some Infrastructure as Code; it can be CloudFormation, Terraform or Ansible. In this case I’m using the CloudFormation templates to do the job.

If you look at CloudFormation graph, you can see the relationships between all the services. The template creates 4 IAM roles (1 for CodeBuild, 1 for CloudWatch Event Rule, 1 for CodePipeline and 1 for CodePipeline to execute CloudFormation SAM templates), 1 CodeBuild Project, 1 CodePipeline pipeline, 1 CloudWatch Event Rule and 1 S3 Bucket that’s used for the services.
Since I built this CloudFormation template and everything is working as it should, I started to changing the template and try other solutions. I create 2 templates for 2 programming languages, Python and Java, with manual approval or automatic approval. My Java solution is using Maven to package the code into a .jar but you can change it to use other solutions, like standalone .jar libraries.